종이학 접기Paper Crane
하늘을 나는 새, 학을 종이로 접어 봐요! 천천히 한 단계씩 따라오면 누구나 할 수 있어요. Let's fold a crane, a beautiful flying bird! Go slowly, one step at a time. You can do it!
- 난이도Level ★★☆
- 시간Time 15분쯤About 15 min
- 단계Steps 11
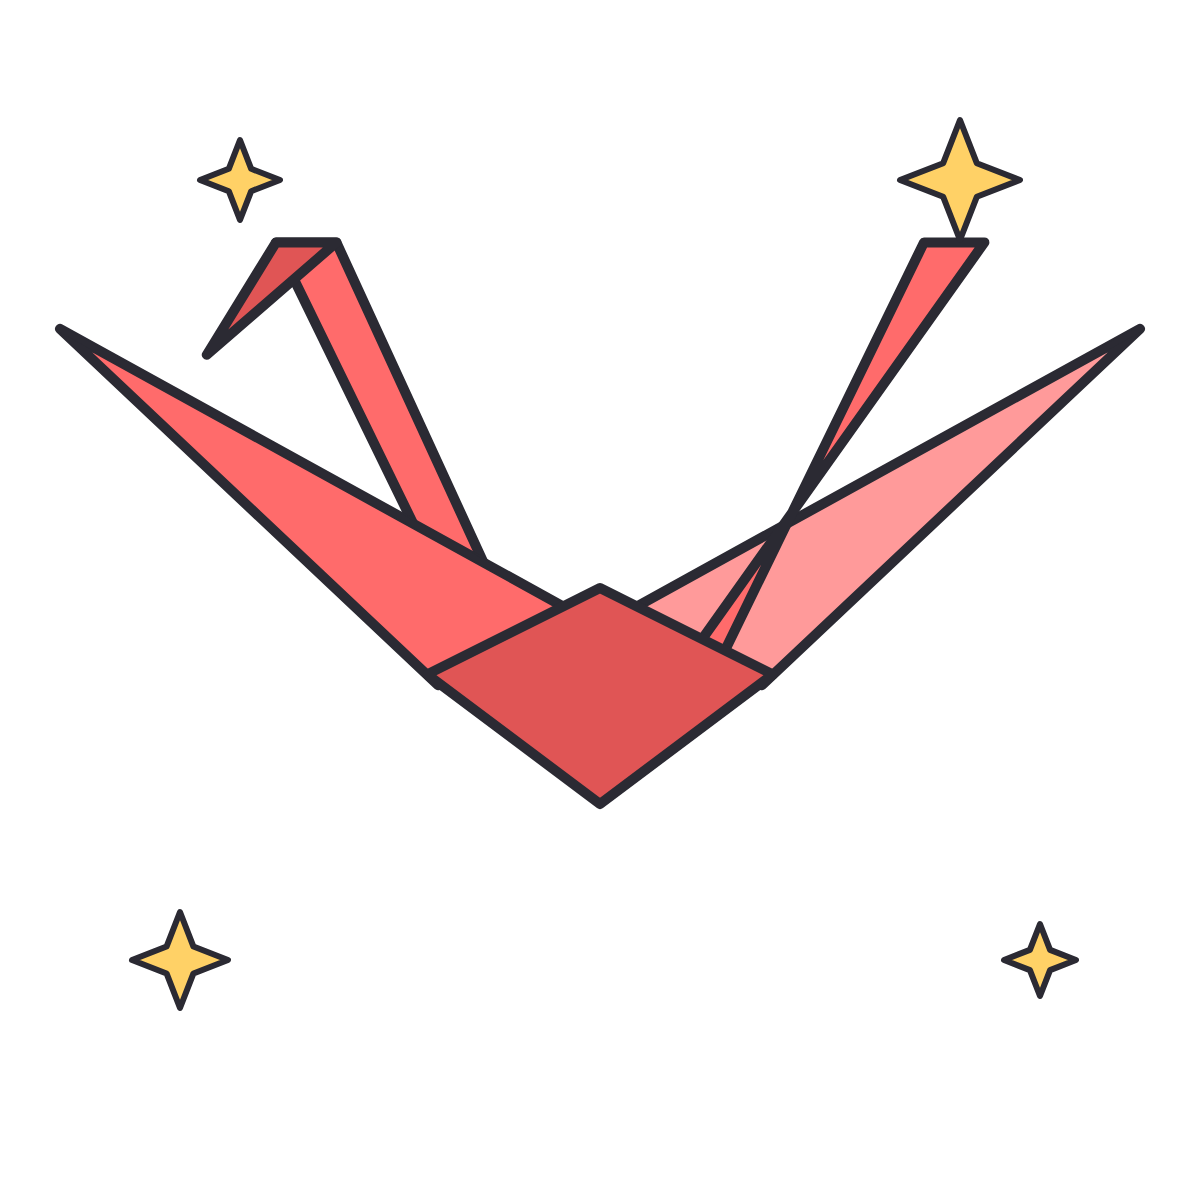
준비물What you need
- 정사각형 색종이 1장 (15cm 크기가 좋아요)1 square sheet of paper (15 cm / 6 in is great)
- 평평한 책상A flat table
- 꾹꾹 눌러 줄 손톱 😊Your fingernail for pressing folds 😊
-
그림 1Picture 1
 1
세모로 접었다 펴요Make triangles
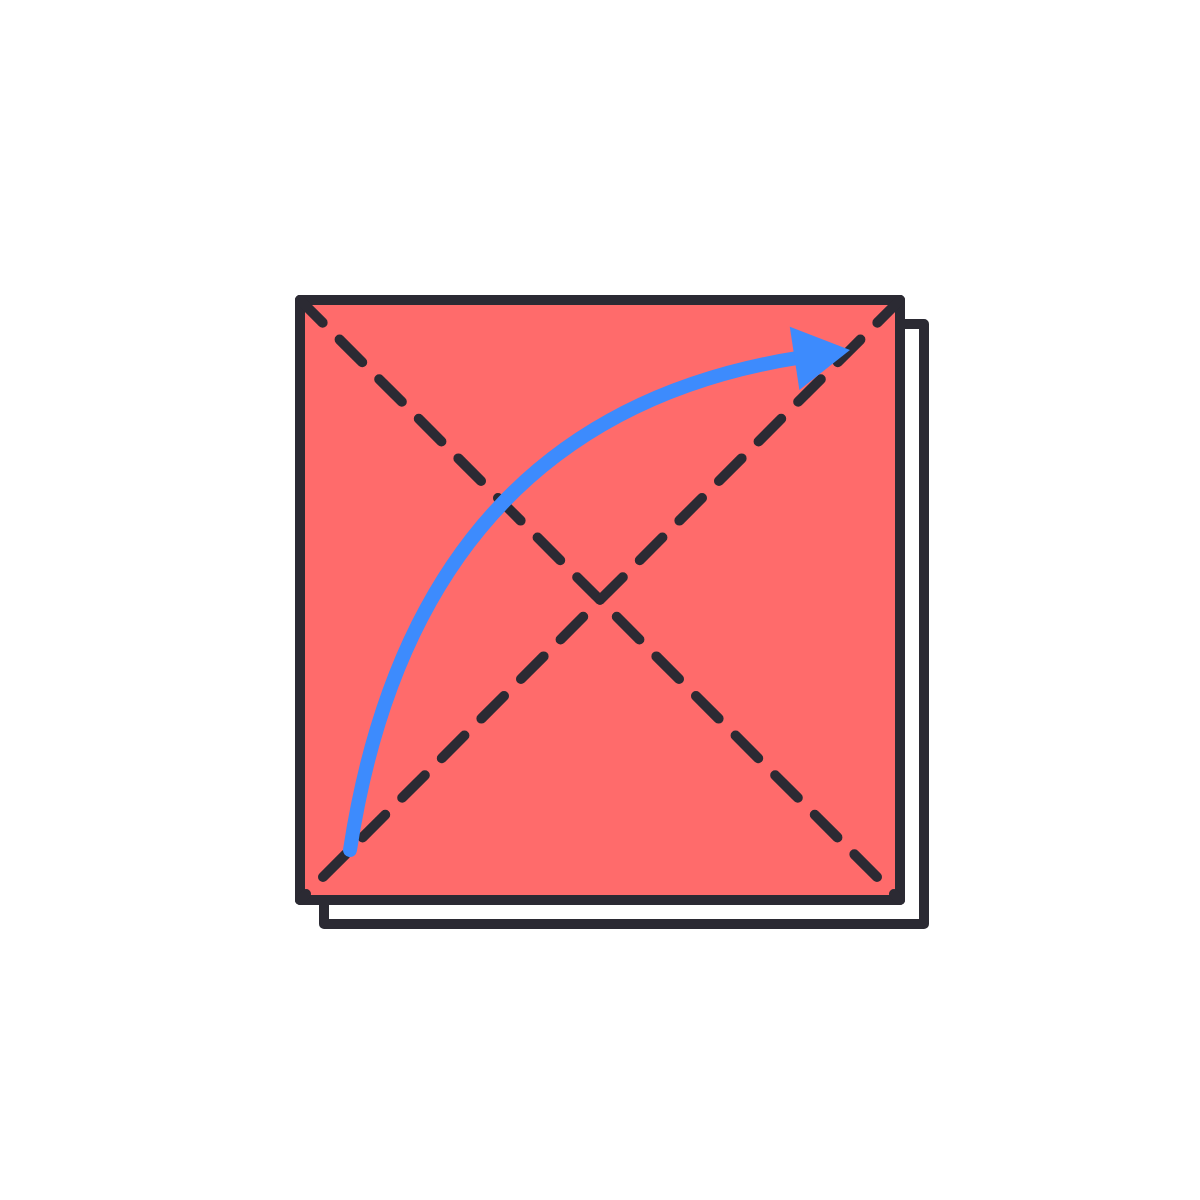
색깔 면이 위로 오게 놓아요. 모서리끼리 맞춰서 세모로 반 접었다가 펴요. 다른 모서리끼리도 똑같이 해요.
Put the paper colored side up. Match two corners and fold it in half into a triangle. Open it. Do the same with the other two corners.
-
그림 2Picture 2
 2
뒤집어서 네모로 접었다 펴요Flip and make rectangles
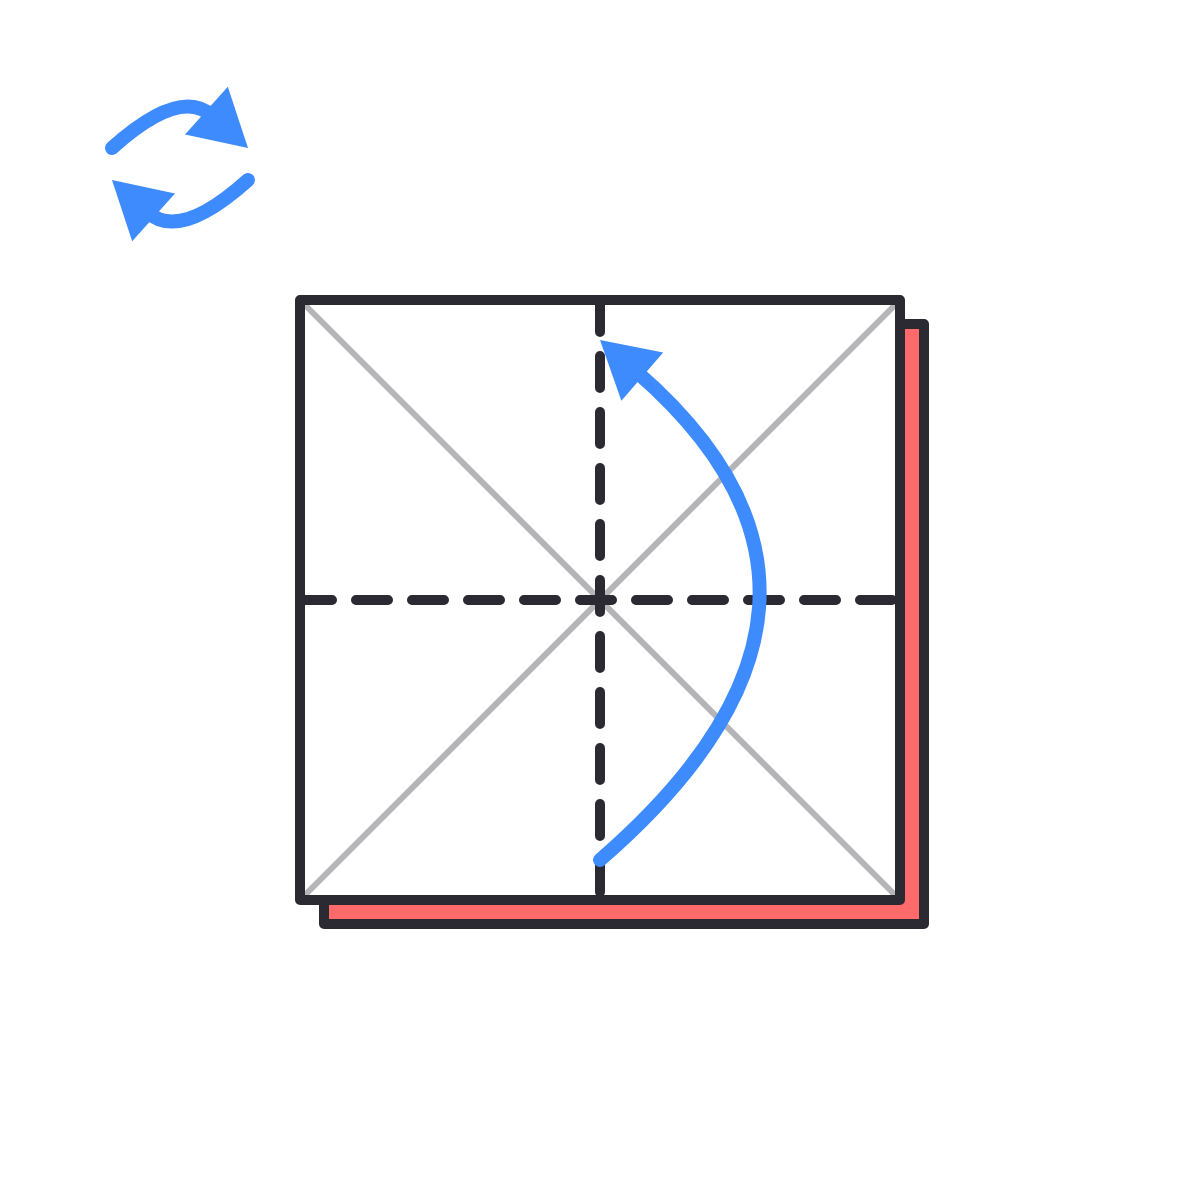
종이를 뒤집어서 하얀 면이 위로 오게 해요. 이번에는 길쭉한 네모가 되게 반 접었다가 펴요. 옆으로도 한 번 더 해요.
Flip the paper so the white side is up. Fold it in half to make a long rectangle. Open it. Do it the other way too.
-
그림 3Picture 3
 3
작은 네모로 모아요Squash into a small square
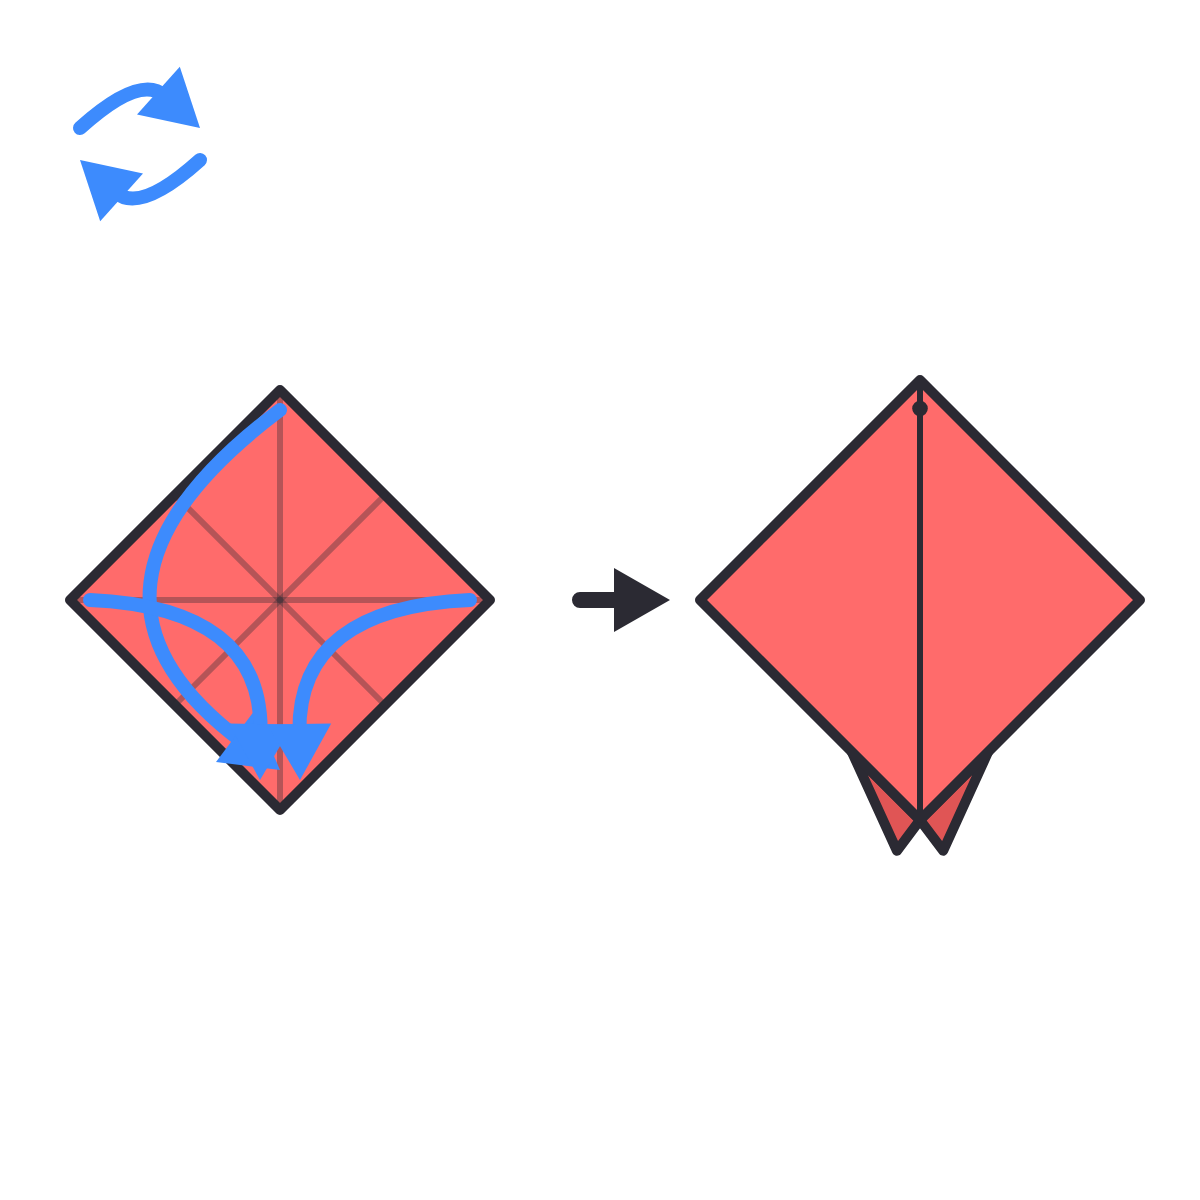
다시 뒤집어서 색깔 면이 위로 오게 해요. 접은 선을 따라 위, 왼쪽, 오른쪽 귀퉁이를 아래 귀퉁이로 모아요. 납작하게 누르면 작은 네모가 돼요. 열린 쪽이 아래로 오게 놓아요.
Flip it back so the colored side is up. Using the lines, bring the top, left and right corners down to the bottom corner. Press flat to make a small square. The open end points down.
💡 잘 안 되면 1~2번 접은 선을 다시 꾹꾹 눌러 보세요.
💡 Tricky? Press the lines from steps 1 and 2 again, nice and hard.
👀 비스듬히 보면 이렇게 모여요👀 Here's how it folds up, step by step ① 가운데를 위로 볼록 올리고 귀퉁이를 안으로 모아요. ② 변의 가운데가 날개처럼 튀어나와요. ③ 위에서 보면 날개 4개가 + 모양이에요. 앞 날개는 오른쪽, 뒤 날개는 왼쪽으로 눕혀요. ④ 양쪽에 날개가 2개씩 겹쳐요. ⑤ 꾹 누르면 작은 네모 완성! ① Push the middle up and bring the corners in. ② The middle of each side pops out like a wing. ③ From the top, the 4 wings make a + shape. Fold the front wing to the right and the back wing to the left. ④ Now there are 2 wings on each side. ⑤ Press flat — a small square! 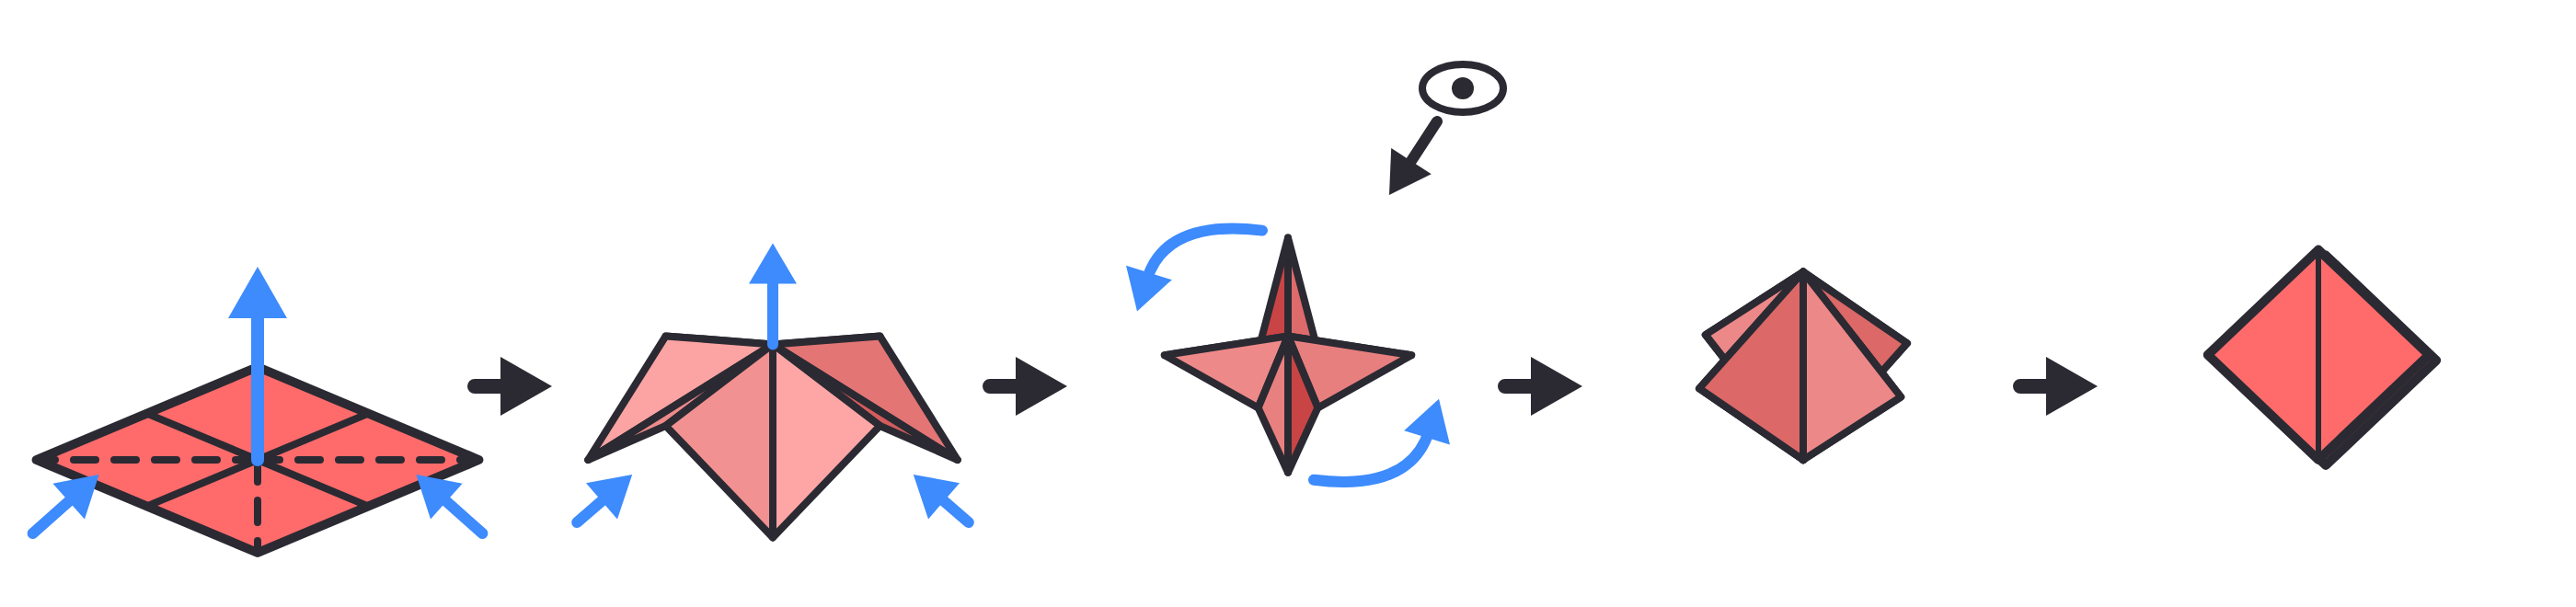
← 옆으로 밀어서 보세요 →← Swipe to see more →
-
그림 4Picture 4
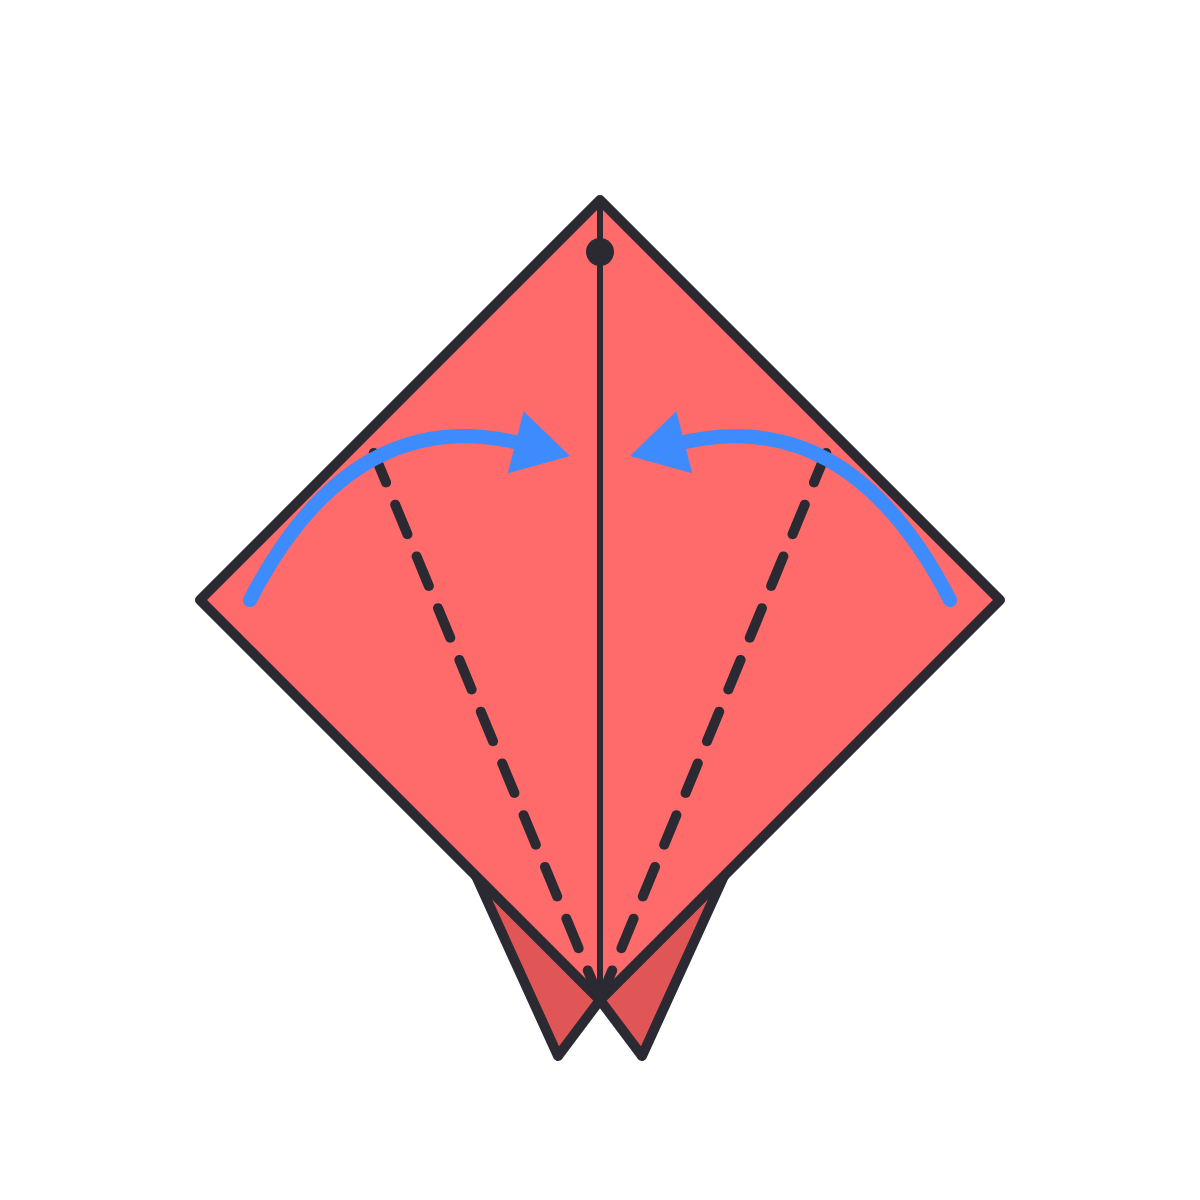 ← 닫힌 쪽종이 가운데← Closed endpaper center← 열린 쪽종이 끝이 여러 장← Open endloose corners4
연 모양 만들기Make a kite shape
👆 먼저 확인! 종이 끝이 여러 장으로 갈라진 열린 쪽이 아래, 뾰족하게 붙어 있는 닫힌 쪽이 위로 오게 놓아요.
👆 Check first! The open end (where the loose paper corners are) goes at the bottom. The closed end (one neat point) goes at the top.
맨 위 한 장만 접어요. 아래쪽 양옆 모서리를 가운데 선에 딱 맞춰 접어요. 연 모양이 됐지요?
Fold the top layer only. Fold the lower left and right edges to the middle line. See? It looks like a kite!
-
그림 5Picture 5
 5
위를 접었다가 모두 펴요Fold the top down, then open
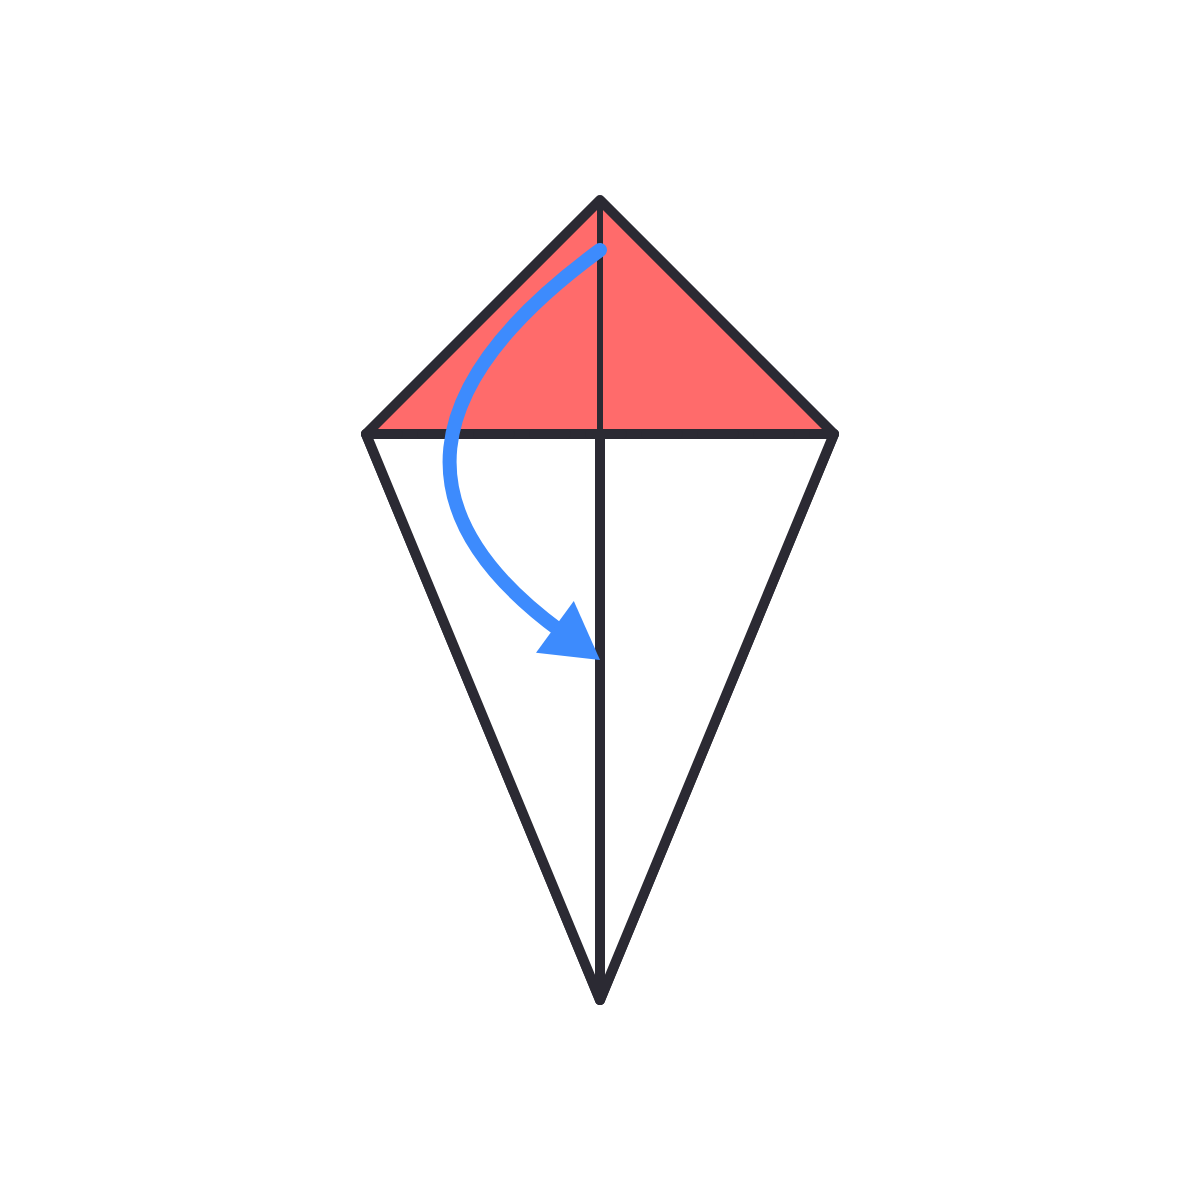
위쪽 작은 세모를 아래로 꾹 접어요. 그다음 4번과 5번에서 접은 것을 모두 다시 펴요. 접힌 선만 남으면 돼요.
Fold the small triangle at the top down and press hard. Then open up the folds from steps 4 and 5. Only the lines stay.
👀 이렇게 다시 펴요👀 Now open it up like this ① 접은 위쪽 세모를 다시 올리고, 양옆 날개도 바깥으로 펴요. ② 그러면 작은 네모로 돌아오고, 파란 세모 모양 접힌 선이 남아요. 이 선이 6번에서 길잡이가 돼요! ① Lift the top triangle back up and open the side flaps. ② You're back to the small square, with a blue triangle of fold lines. These lines help you in step 6! 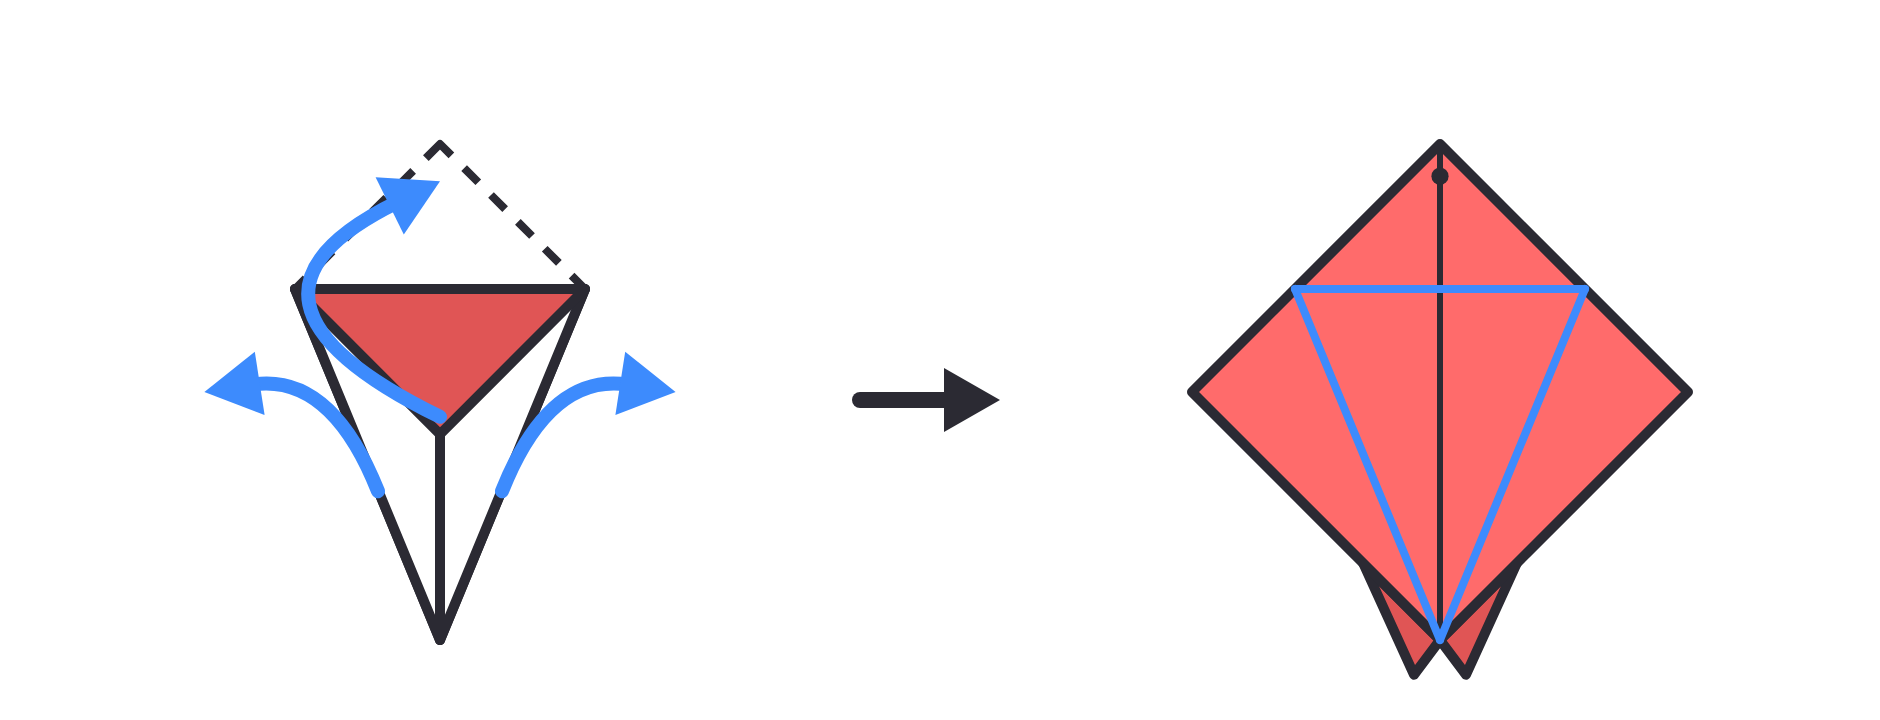
-
그림 6Picture 6
 6
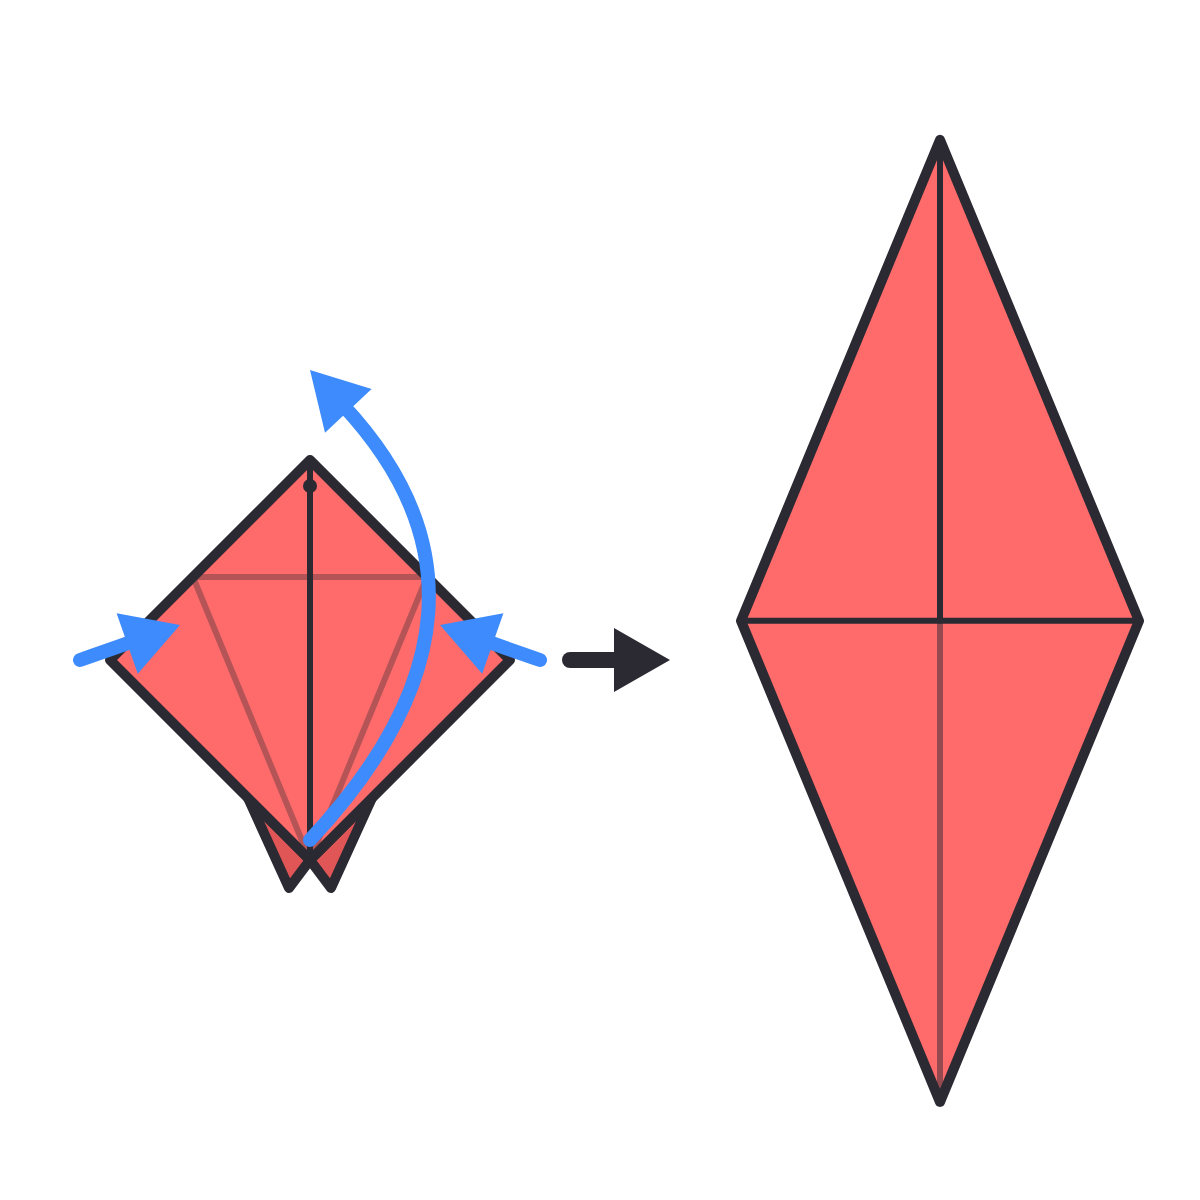
위로 쭉 들어 올려요Lift it up
어려워요! 어른과 함께Tricky! Ask a grown-up맨 위 한 장의 아래 꼭짓점을 잡고 위로 쭉 들어 올려요. 양옆은 접힌 선을 따라 안쪽으로 쏙 들어가요. 꾹 누르면 길쭉한 다이아몬드가 돼요!
Hold the bottom corner of the top layer and lift it all the way up. The sides fold in along the lines. Press flat. Now you have a long diamond!
👀 천천히 나눠서 보면👀 Slowly, one move at a time ① 맨 위 한 장의 아래 꼭짓점만 잡아요. ② 위로 들어 올리면 양옆이 접힌 선을 따라 안으로 쏙 들어와요. 손가락으로 양옆을 살살 밀어 주세요. ③ 끝까지 올리고 꾹 누르면 길쭉한 다이아몬드! ① Hold only the bottom point of the top layer. ② As you lift it, the sides fold in along the lines. Gently push the sides in with your fingers. ③ Lift all the way and press flat — a long diamond! 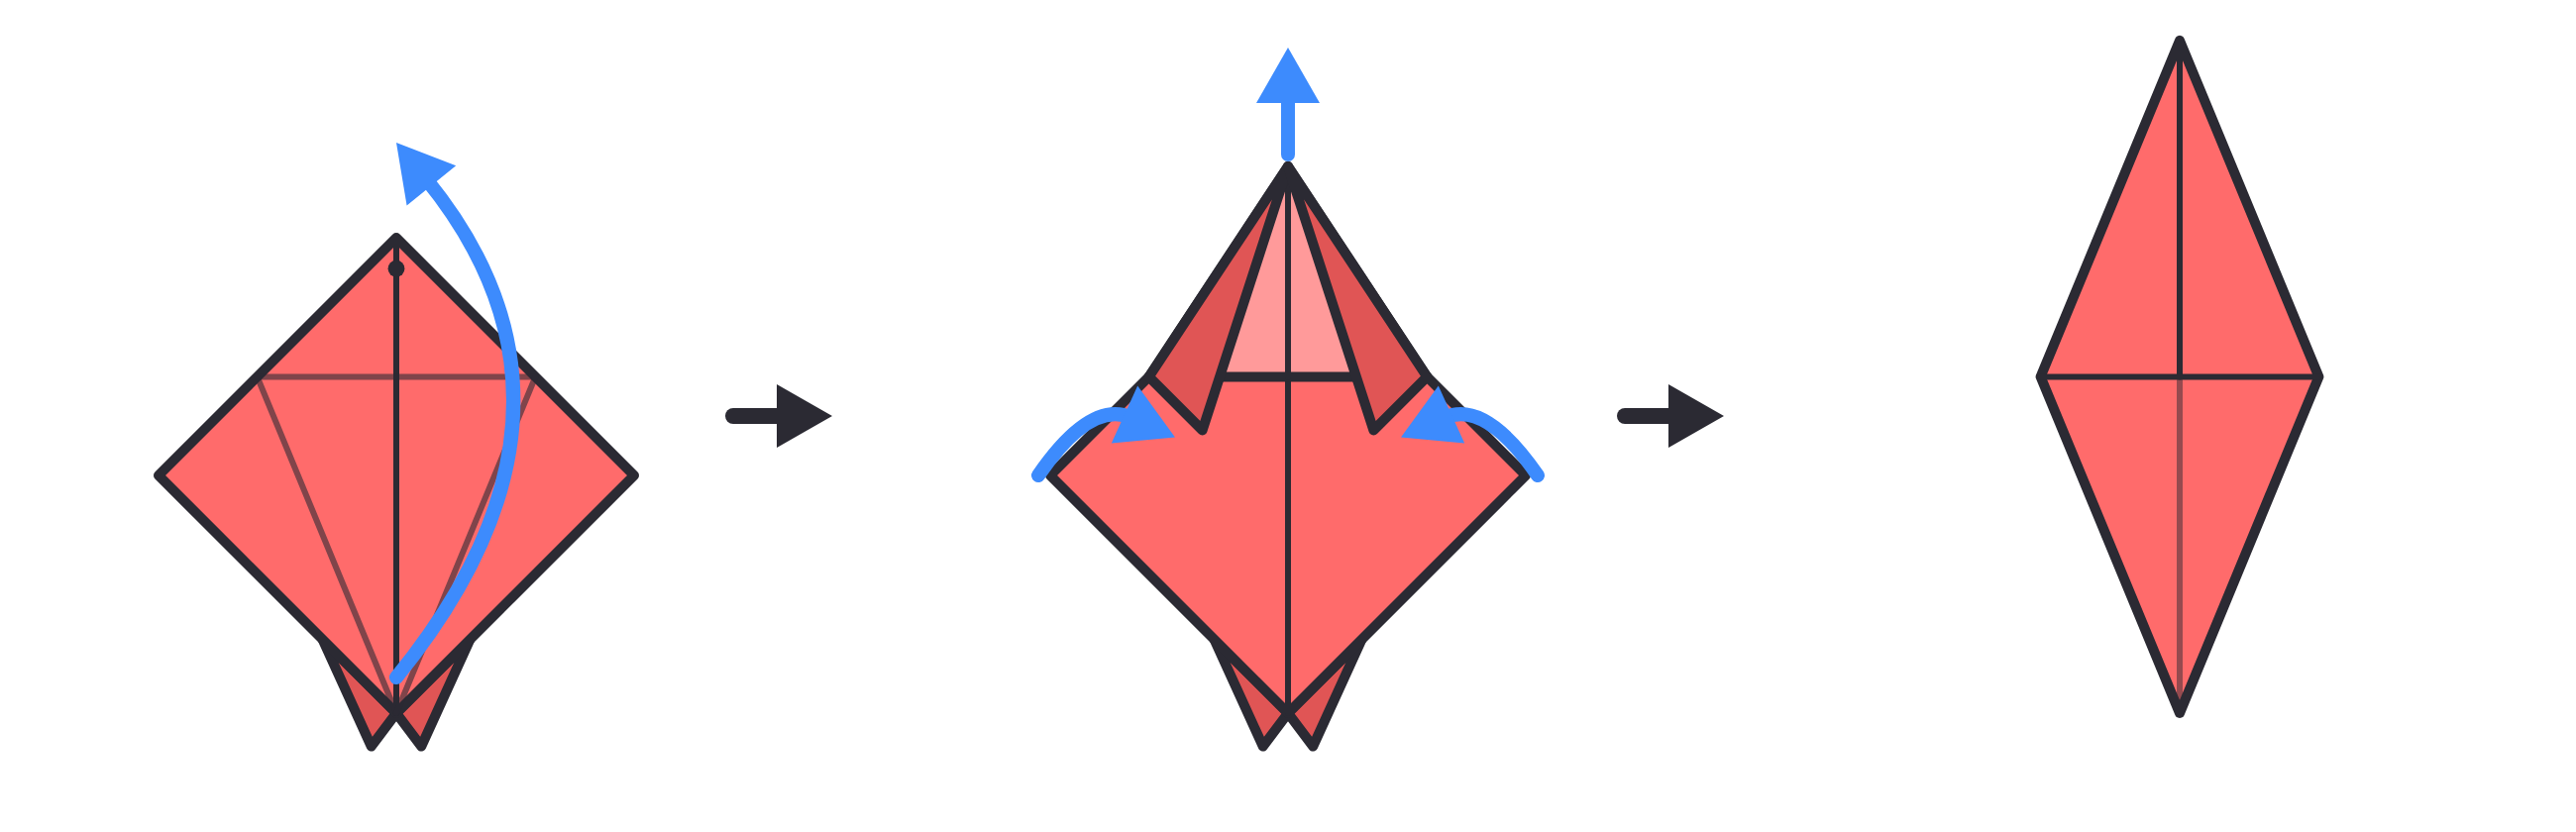
← 옆으로 밀어서 보세요 →← Swipe to see more →
-
그림 7Picture 7
 7
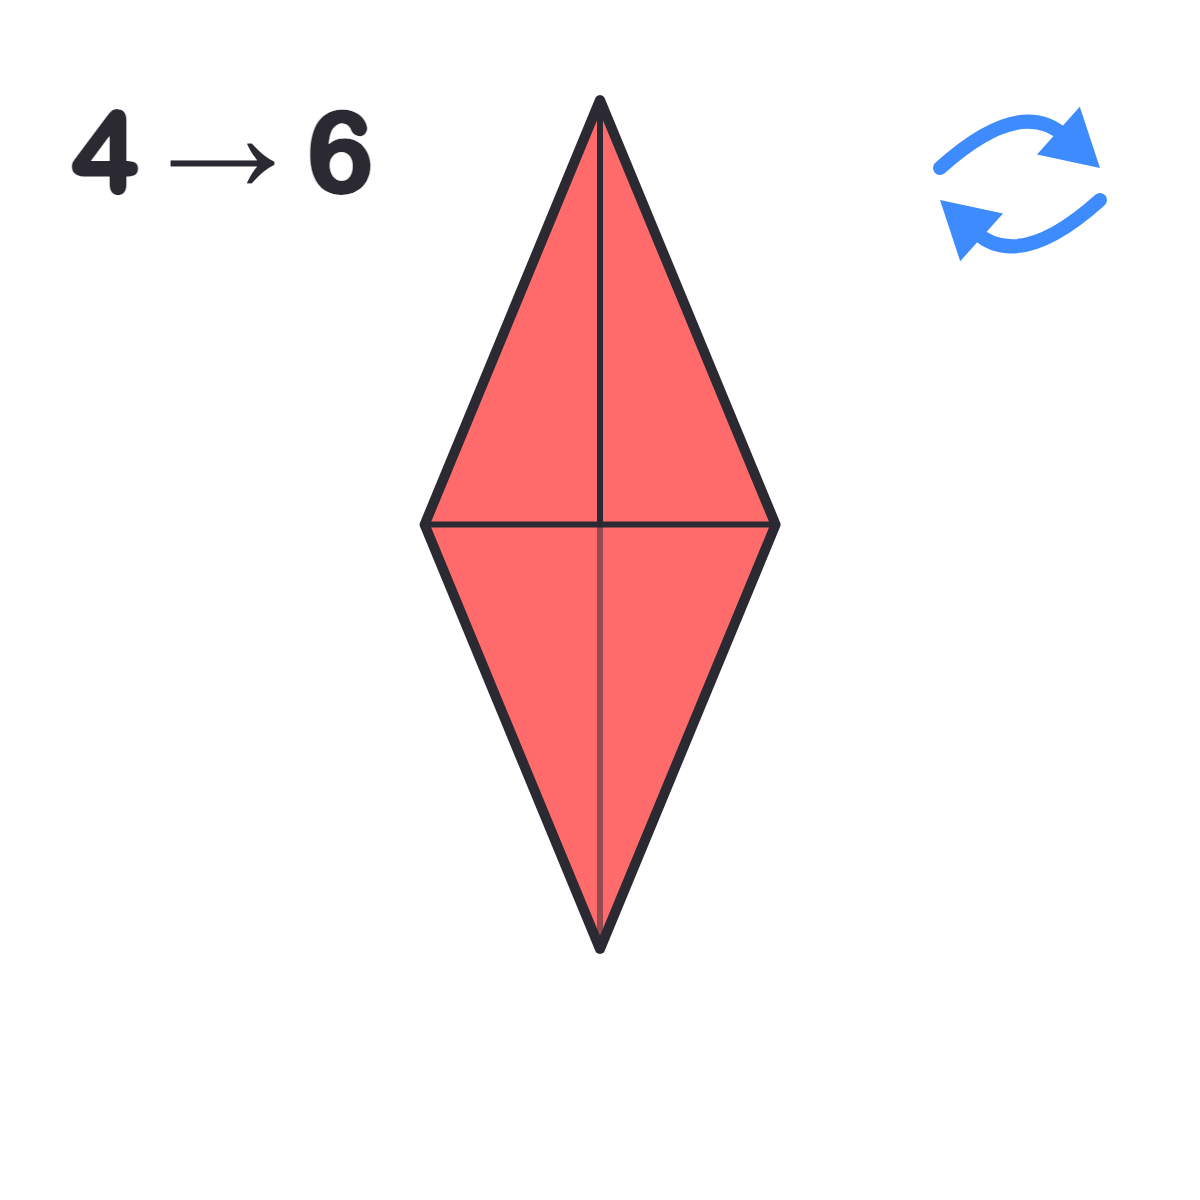
뒤집어서 한 번 더!Flip and do it again!
종이를 뒤집어요. 뒷면도 4번, 5번, 6번을 똑같이 해요. 앞뒤 모두 다이아몬드가 됐으면 성공!
Flip the paper over. Do steps 4, 5 and 6 on this side too. Diamonds on both sides? Great job!
-
그림 8Picture 8
 8
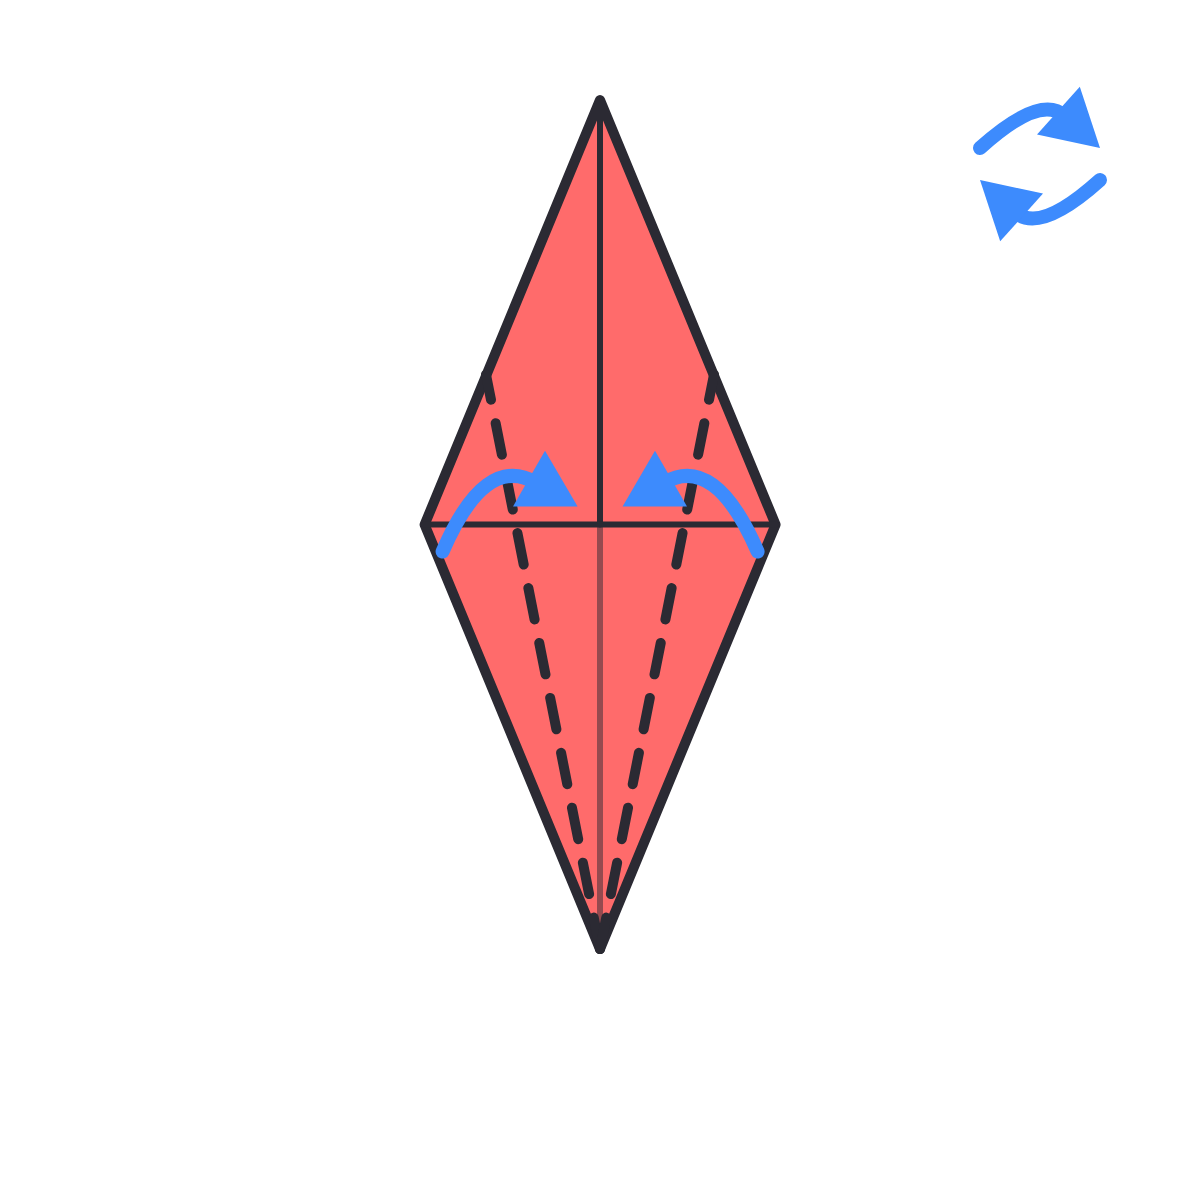
다리를 날씬하게Make the legs skinny
맨 위 한 장의 아래쪽 양옆을 가운데 선에 맞춰 한 번 더 접어요. 뒤집어서 뒷면도 똑같이 해요. 아래가 날씬해졌지요?
Fold the lower edges of the top layer to the middle line again. Flip over and do the same. The bottom is nice and skinny now!
-
그림 9Picture 9
 9
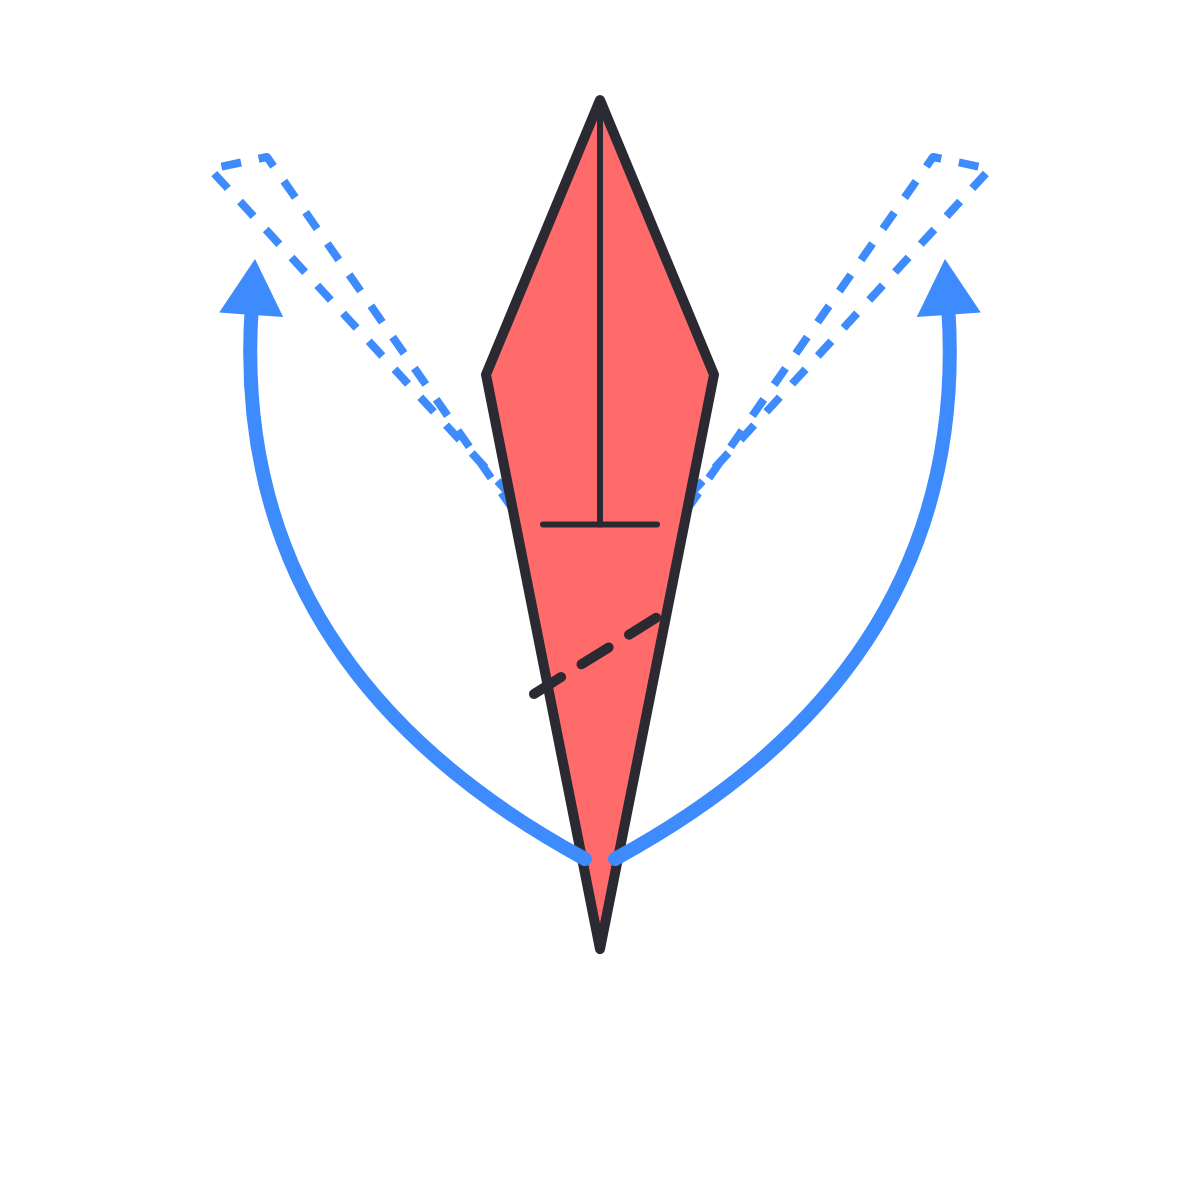
목과 꼬리 세우기Raise the neck and tail
어려워요! 어른과 함께Tricky! Ask a grown-up날씬한 다리 하나를 종이 사이로 쏙 넣으면서 위로 비스듬히 올려요. 다른 다리도 똑같이 해요. 하나는 목, 하나는 꼬리가 돼요.
Take one skinny leg and fold it up at a slant, tucking it between the layers. Do the same with the other leg. One is the neck, one is the tail.
💡 먼저 바깥으로 접어 선을 만든 다음, 펴서 안쪽으로 넣으면 쉬워요.
💡 Easy trick: fold it outside first to make a line, open it, then push it inside.
-
그림 10Picture 10
 10
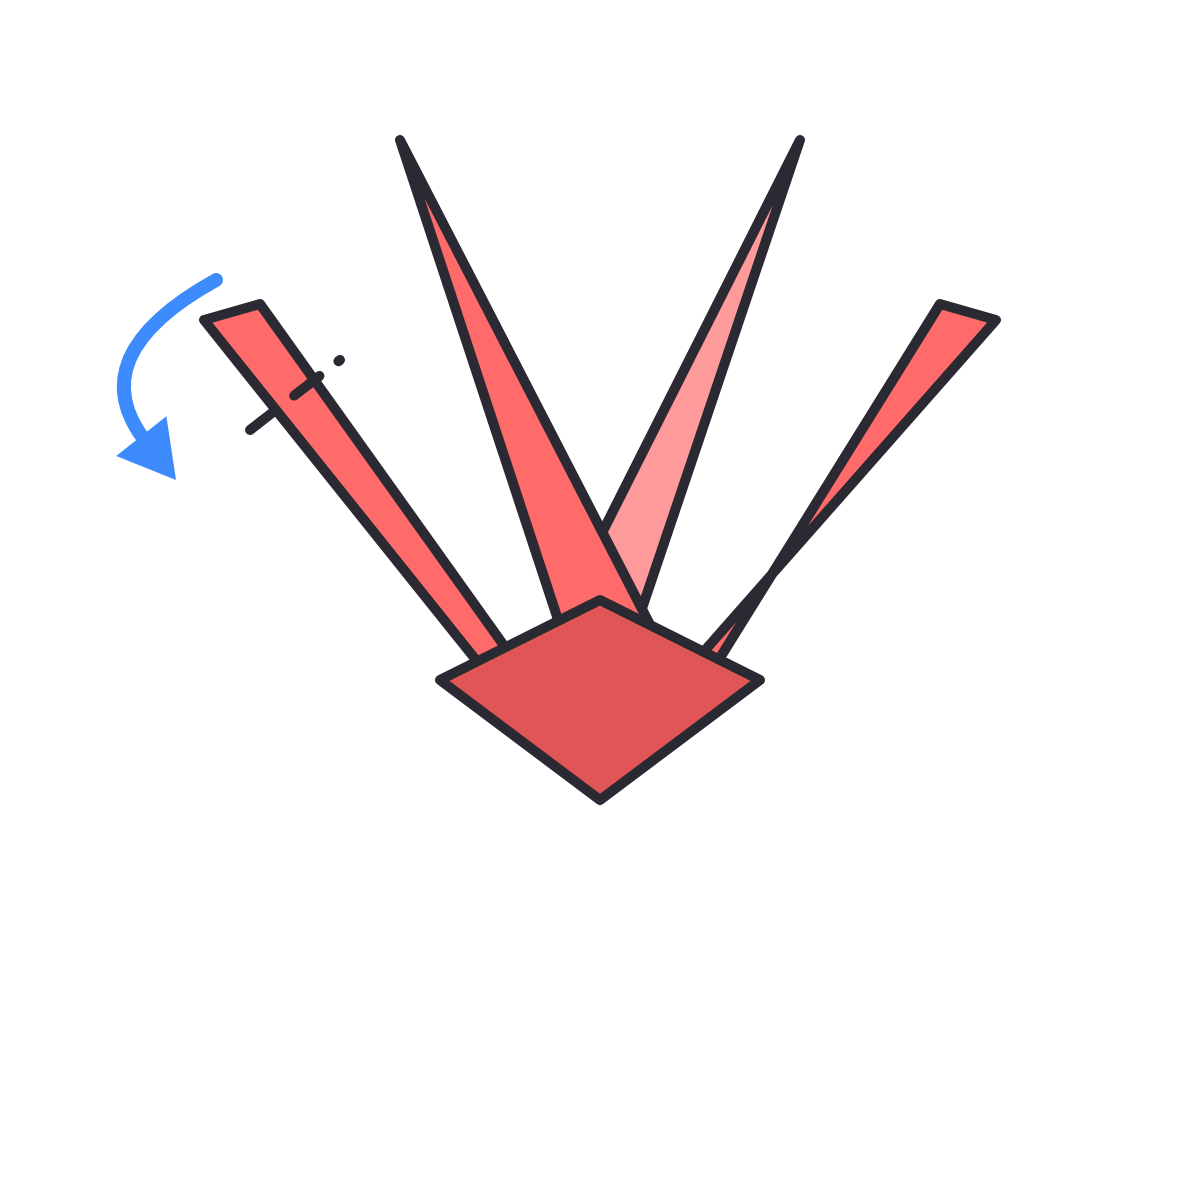
머리 만들기Make the head
목의 끝을 조금만 아래로 접어 넣어요. 귀여운 머리와 부리가 생겼어요!
Fold a small tip of the neck down and tuck it in. Now your crane has a cute head and beak!
-
그림 11Picture 11
 11
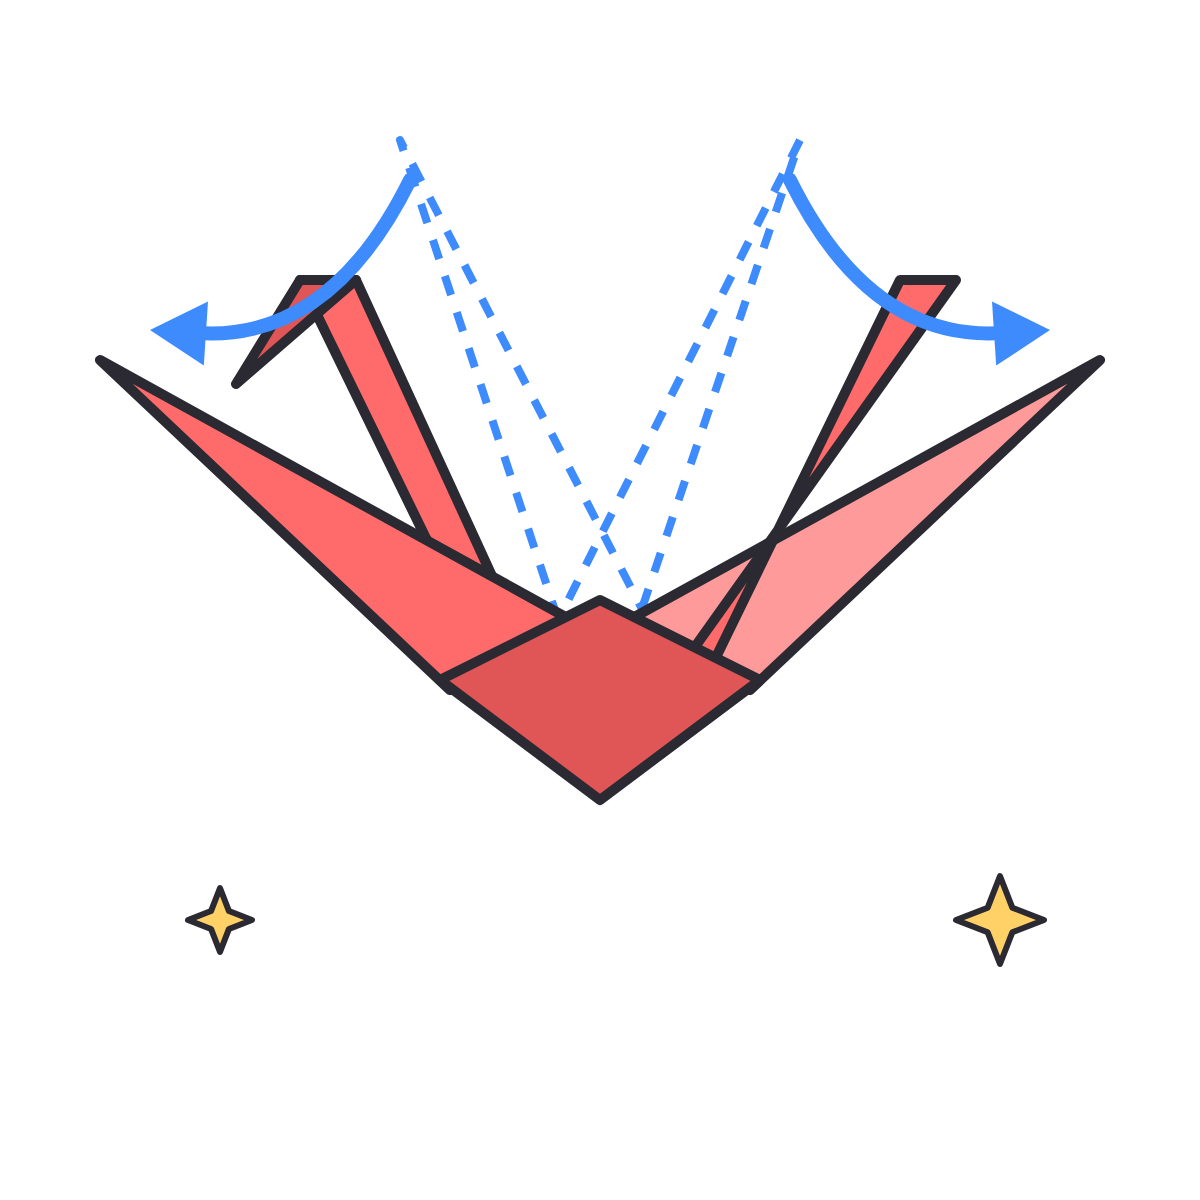
날개 펴기Open the wings
양쪽 날개를 살살 내려 펴 주세요. 몸통을 살짝 부풀리면 종이학 완성!
Gently pull both wings down. Puff up the body a little. Your crane is done!
와, 종이학을 완성했어요!Yay, you made a paper crane!
일본에는 종이학 천 마리를 접으면 소원이 이루어진다는 이야기가 있어요. 다른 색 종이로 친구들을 더 만들어 볼까요?
There's a story from Japan: if you fold 1,000 cranes, your wish comes true! Try more cranes with different colors.